p3ng0s devlog #4: Attacking windows
Created on Tue. 28 April 2026

Welcome to the last post of this series on p3ng0s V1 devlog. If you are new please start from the first post here. After this post there will be an official release over on github where you can download a copy of the V1 of this project and test this project out ^^.
p3ng0s: A live linux distribution designed by me for physical engagments and red team automation.
p3ng0s does come with a wiki here. In the wiki there is a legacy section showcasing all the older versions before V1 if you are curious here. Now this post won't cover the history of p3ng0s, this post covers attacking machines directly with p3ng0s you might not remember but one of the first things I mentioned in this post series is that I used to walk around with a kali usb stick and would dump Windows System HIVES with it when the machines where turned off using ophcrack and I would run the hash against crackstation and that was my first ever taste of red teaming as a teenager :)
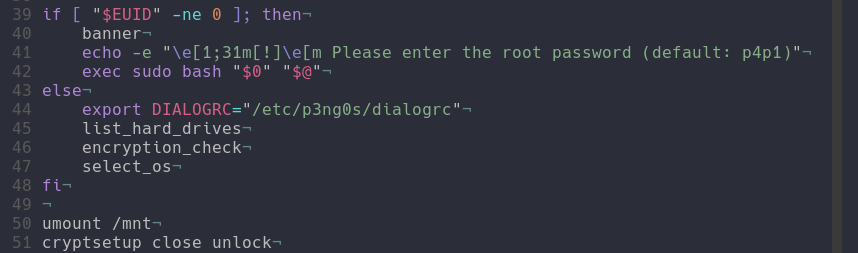
os_killer.sh
This was a feature that originated in V0.4 of p3ng0s that whole concept of the kali stick with ophcrack was actually something I was dreaming of automating with this .iso and I actually managed to do it back then even thow there was main features missing (bitlocker support, hybernation support). Those features are now present :)
At it's core os_killer is honestly just a smart bash script that mounts drives for you and runs simple attacks on the machine file system present in the drive. os_killer is ment to be ran through the TTY via the option nuke installed OS, yes the option sounds scary cause it is you will see :)
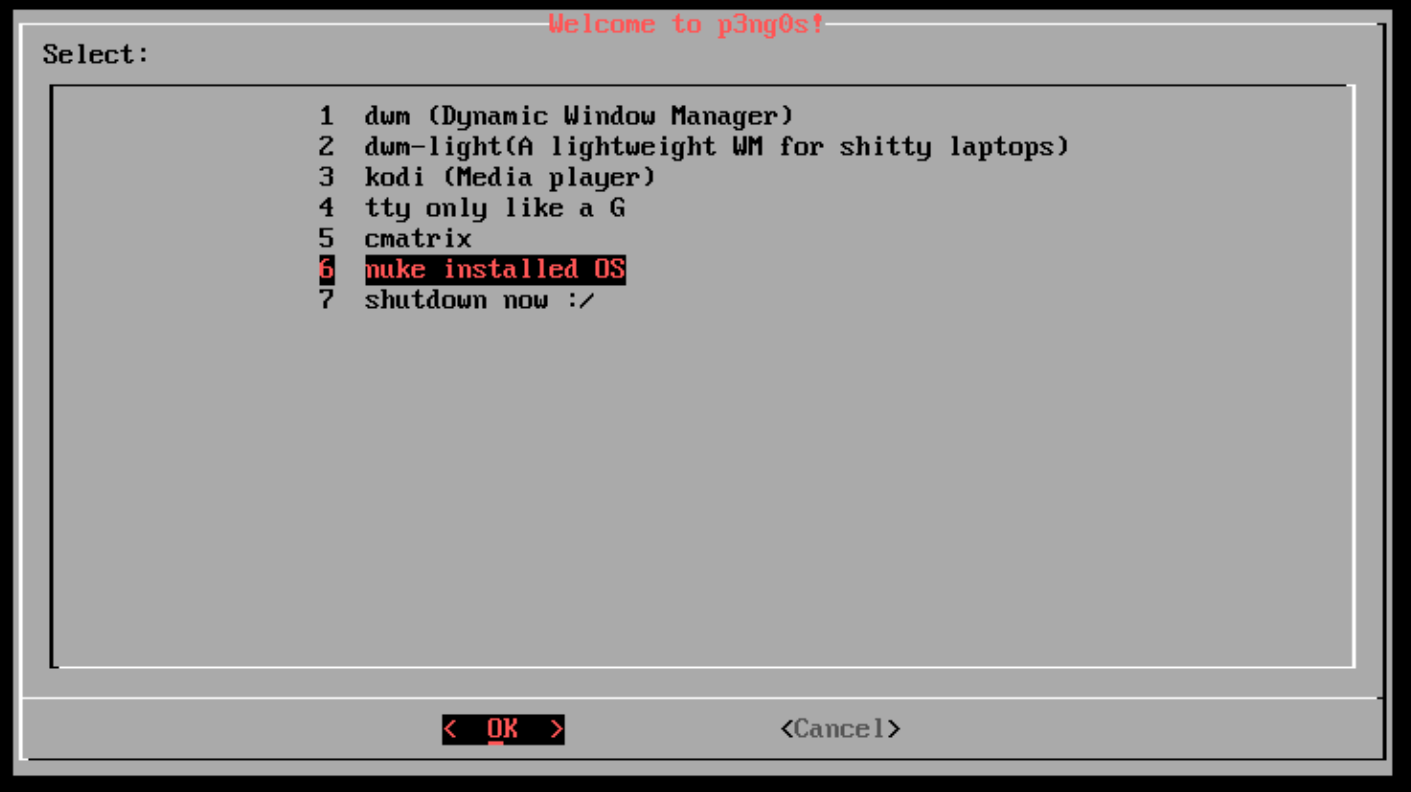
So after selecting OS killer under the hood does a few cool things:
os_killer starts with first listing out the available machine drives you
can usually guess where the file system lives based on the size of the drive (
biggest one is the filesystem). From there os_killer will do an encryption check
It will first check if the drive is a bitlocker drive or a luks encrypted drive
it will also look inside of loot/bitlocker.txt for bitlocker
keys and code/luks.txt to look for bitlocker keys those two
files can have as many passwords as you want in them yes its a built in
brute forcer if you want it to be, a slow one but one non the less.
From there you are prompted what OS type it is you can either select Windows
or Linux those are the two main modes supported by os_killer. Provided
is a sample loot structure of os_killer.sh:
loot/
├── bitlocker.txt    # The bitlocker keys to try on the drive
├── luks.txt         # The luks keys to try on the selected drive
├── agent.exe        # the agent exe to infect the machine with
├── agent.svc.exe    # the agent service to infect the machine with
└── agent.elf        # The linug agent to infect the machine with
Windows
If you select a Windows file system there is an other check which is for windows 11 hybernation since those machines don't gracefully stop and actually fast shutdown without actually turning everything off this is all thanks to windows 11 :)
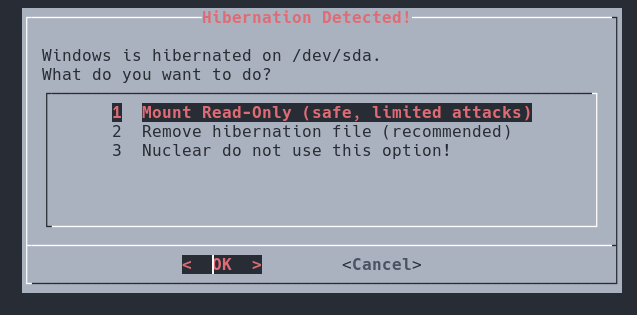
With hybernation you have specific read and write modes available to you since reading the drive is actually stealthier than writing to it :) shocker right. Well you can decide to only go read only mode great for just dumping hashes!
The windows mode obviously is the one that has the most attacks right now
and is great for attacking corporate laptops you could theoretically disable
secure boot on a laptop during an engagement, ask for the bitlocker keys
to "fix" your laptop put them all in the loot/bitlocker.txt file
then extract the hashes and start owning the network :)
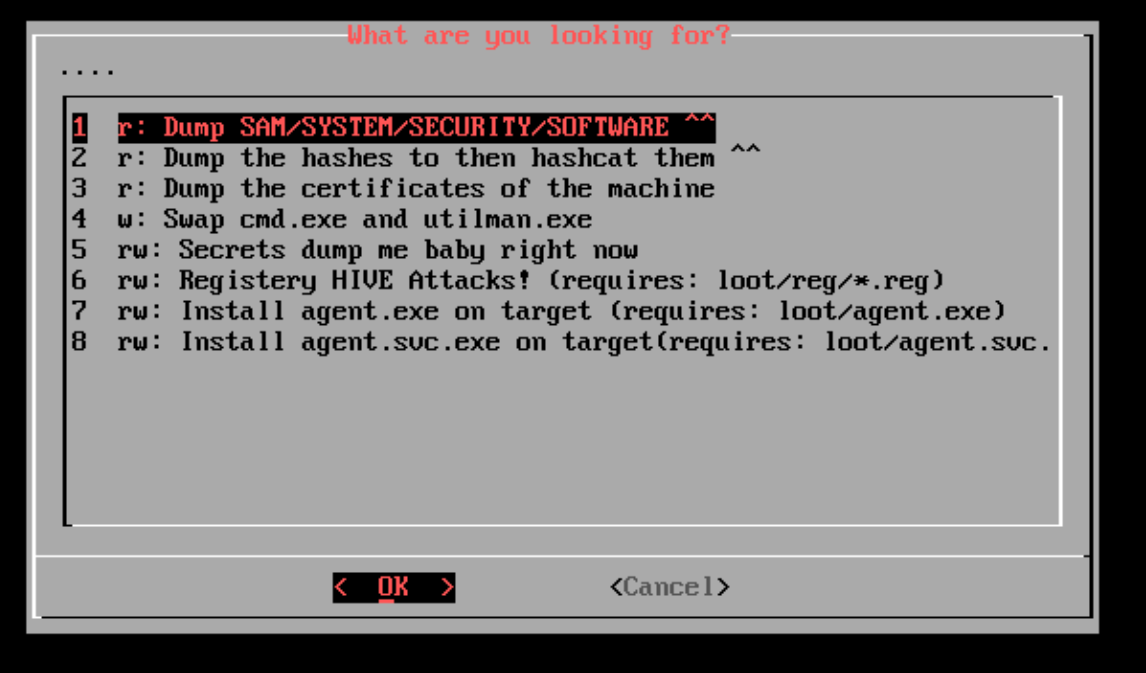
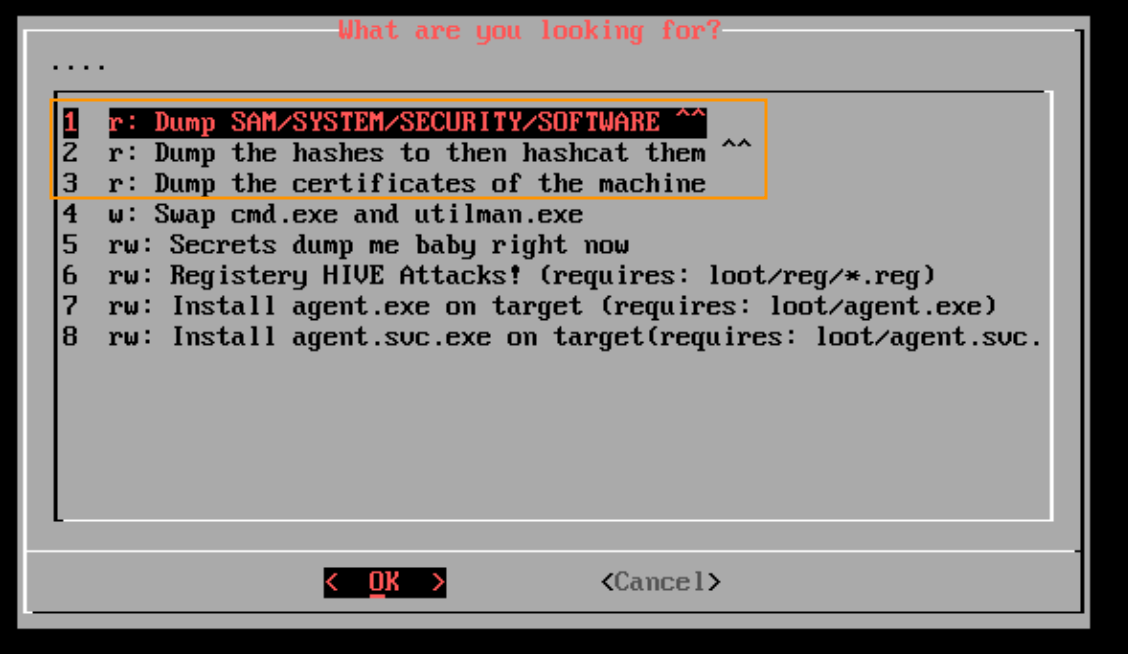
The main features of windows attacks are in two groups the ones with
only read permissions and the ones with read and/or write. The ones I
am especially proud of are the hashcat mode integration where we actually
dump the SAM/SYSTEM/SECURITY have with secretsdump and extract all the hashes
with the correct hashcat mode set directly into loot/hashcat/hash.1000.
This would allow you to then boot cycle and get the hashes cracked directly on the
machine you just dumped the hashes from :D. The other cool one is the
certificate dumper this will take the certificates present in the SOFTWARE
hive and store them in loot/certs. This feature is explained
more in detail bellow!
linux
This section is less feature complete as windows since I never really
encounter linux machines in the wild compared to at home so I mainly
implemented either copies of windows attacks and the chroot
utility great to have a root shell directly on the target!
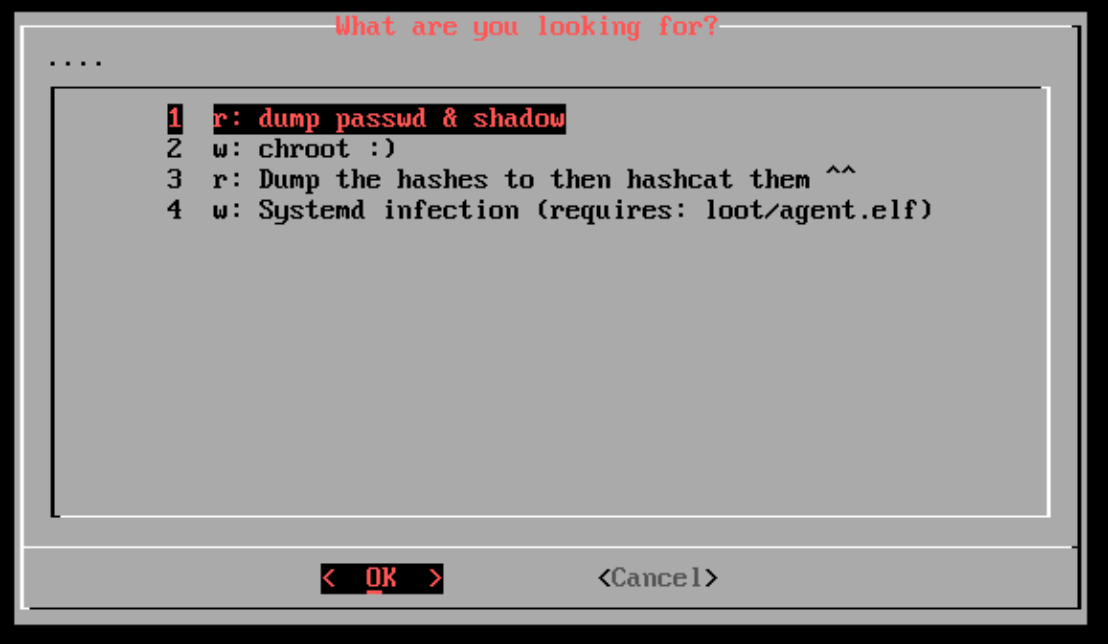
There also is a cool utility that will infect systemd so that at startup of the linux machine a elf binary is ran on startup, the possibilities are endless :)
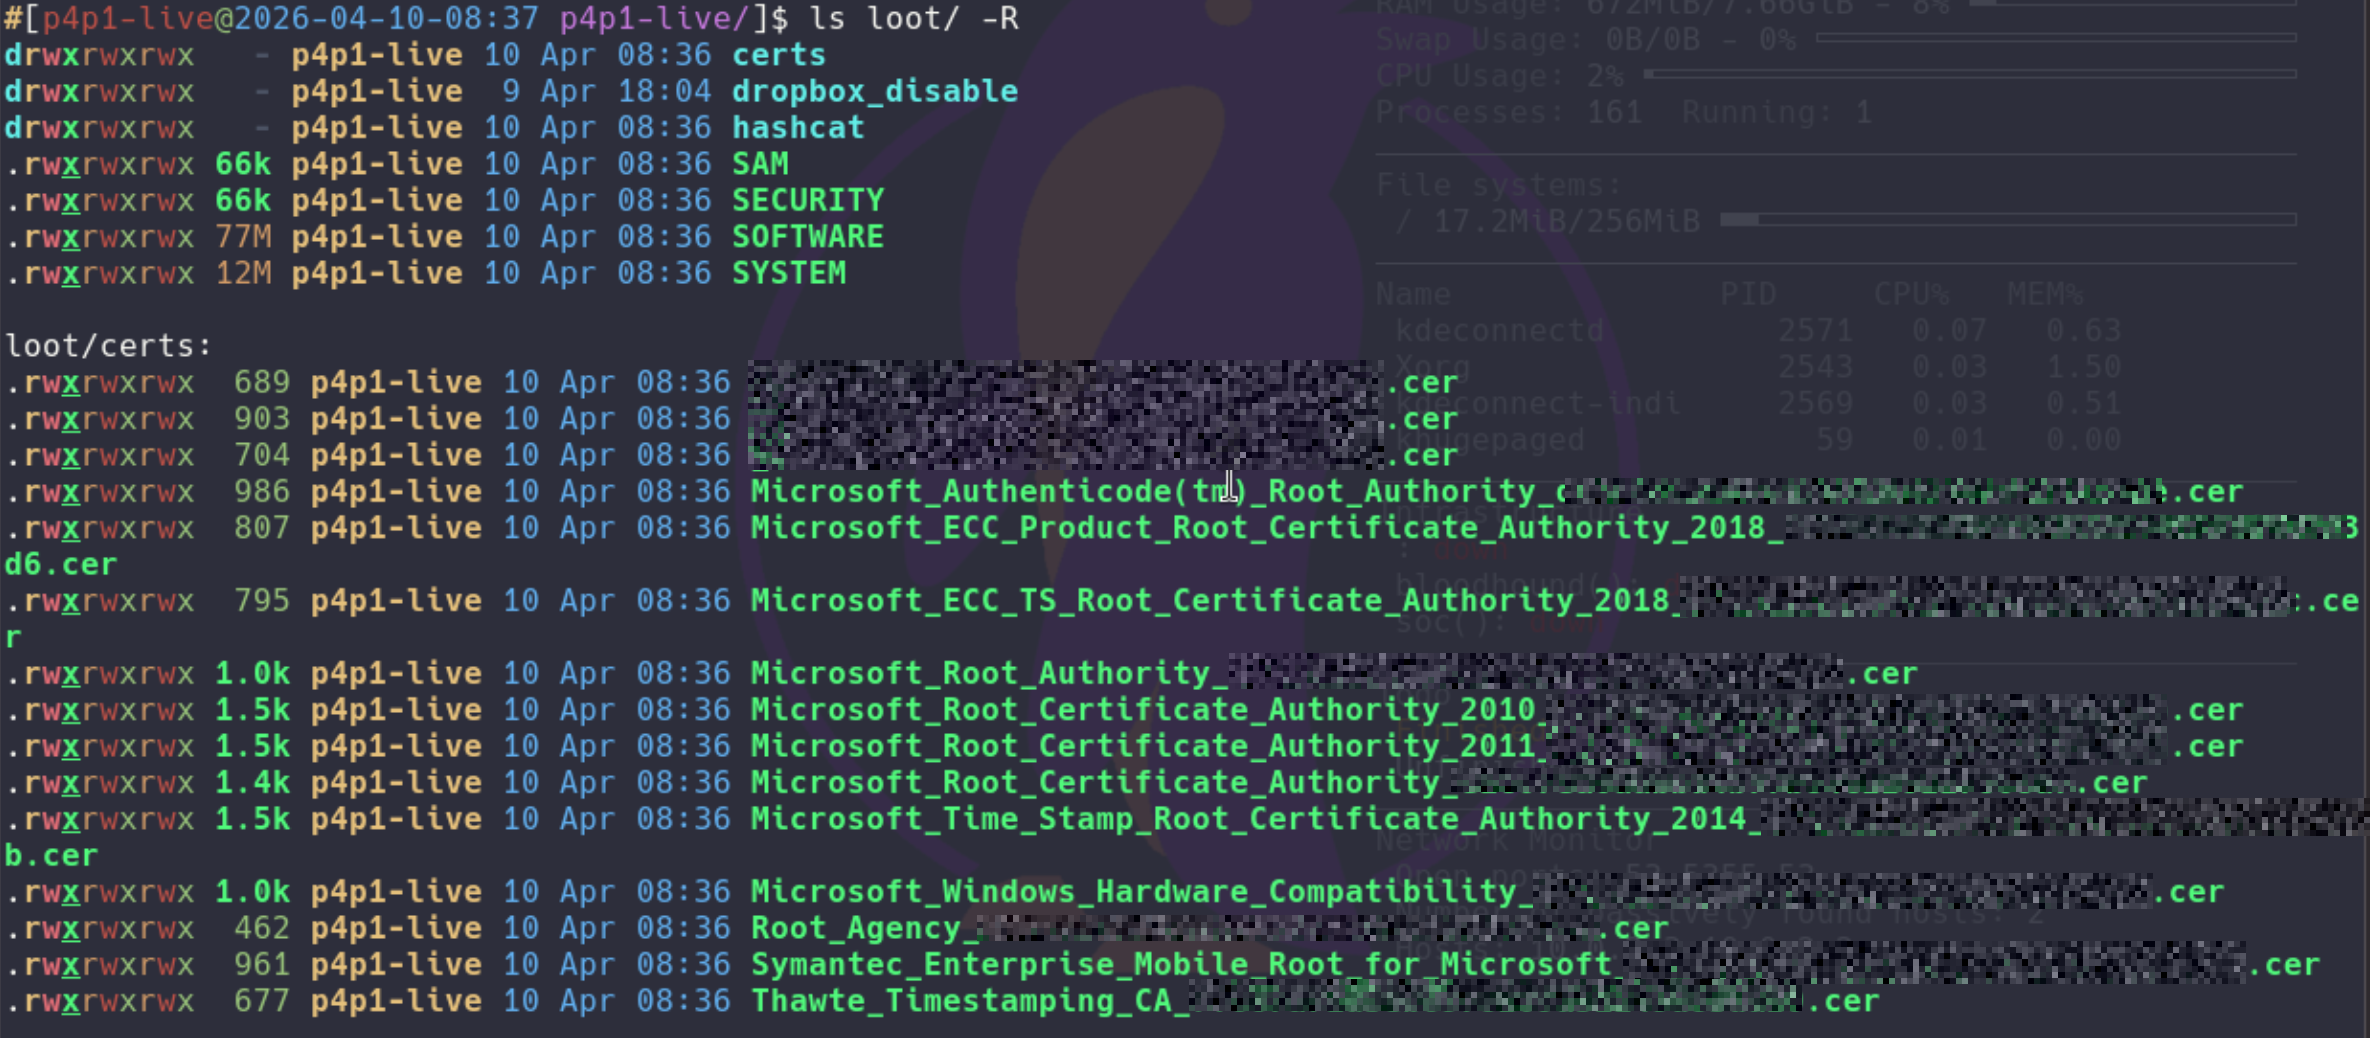
LOOT certificate installer
Like seen in the windows section p3ng0s.iso comes with a certificate manager that will install certificates on startup of the machines you can use this for 1st dumping the machine certificates with os killer enabling the dropbox mode and boot cycle then in your dropbox you will have no HTTPS errors on the client network :) In the future with this I also want to dump PEAP wifi certs and have them auto install this will be a V2 feature clearly!
Here is a sample loot structure for the loot/certs folder:
loot/
├── dropbox/
├── hashcat/
├── certs/                # The folder for certificates to have them pre-install
│   ├── certificate1.cer  # sample certificate
│   └── certificate2.cer
└── reg/                  # Registry file attacks
Registry HIVE attacks
You might have missed in but in os_killer there actually is a attack
where you can directly edit the HIVES of the system this is done through
loot/reg/*.reg files you have to write them before hand drop
them in the correct folder and os killer will present you to them you can
then patch the HIVES accordingly and do some crazy stuff like adding defender
exclusion paths.
loot/
├── dropbox/
├── hashcat/
├── certs/
└── reg/                         # Registry file attacks
    └── HIVE_example-attack.reg  # Sample .reg file
The .reg files need to follow this naming convention:
HIVE_attack-name.reg where in all caps its the actual hive
name for example SOFTWARE_windows-defender-exlusion-path-addition.reg.
This attack is clearly the most busted one through the windows HIVES you can clearly modify a lot of the system you are targeting like the exclusion path mentioned above or even add rogue accounts to the system. The possibilities are endless here!
Full Attack Chain
Here is the final chef's kiss of this blog post series where I will demonstrate a full chain attack using p3ng0s.iso.
You are a redteamer tasked with infiltrating a company as a new hire you are
provided a corporate laptop and from there the objective would be to get
full domain privileges. On your first day you pick up your laptop sit in the
office and start getting to work! You first disable secure boot on the laptop
and go to IT support saying that after an update you were prompted for the
bitlocker keys so you ask them hey can you type it in so I can start working
can you also write it on a piece of paper for me in case this happens during
a home office day. From there you go back to your desk and plug in a fresh
copy of p3ng0s.iso. You first boot into the normal system and launch
os_killer.sh. You then proceed to dump the hashes of the machine and certificates
of the machine:
From there your LOOT folder is now ready with all the credentials. You then go about your day with everything dumped slowly collecting names of different machine CORPO-NOTEBOOK-1213, etc...

Once home that night you plug in the p3ng0s.iso to a machine at home that has a GPU and start cracking the ntlm hashes you gathered that day:
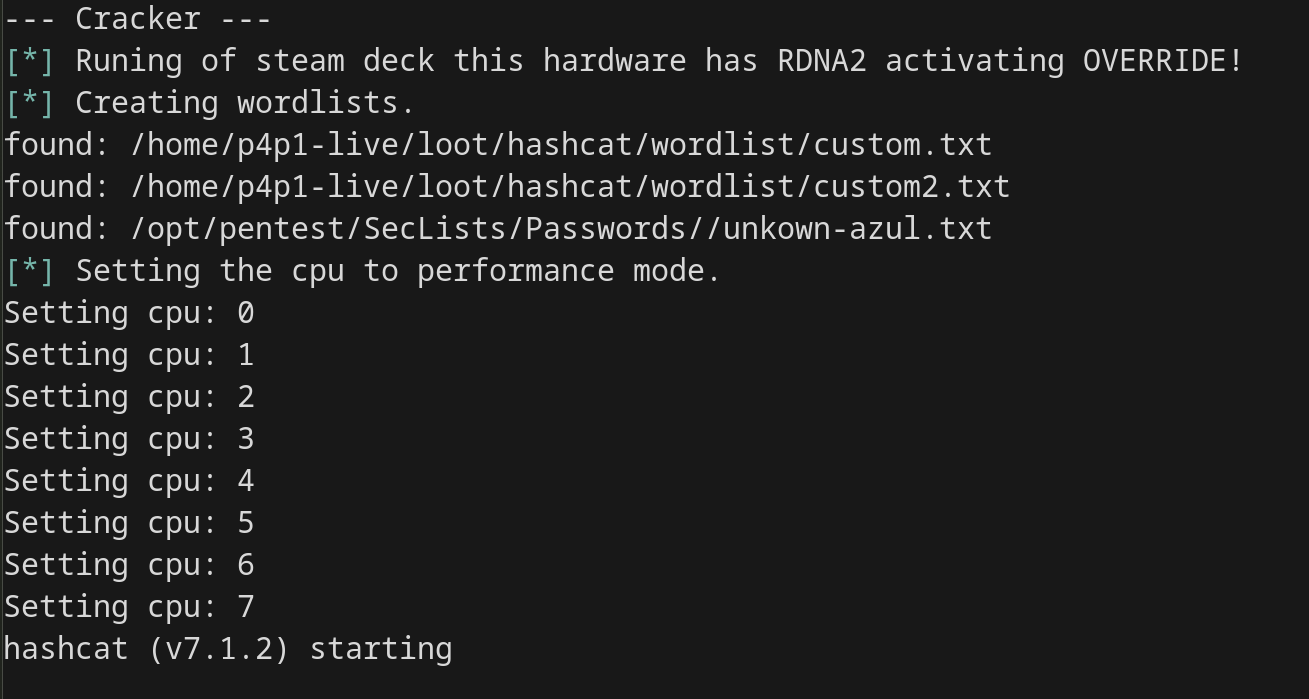
Next morning you wake up and hopefully cracked a few hashes, while drinking
coffee you setup the loot/dropbox folder where you setup all
the infra files and disable the hashcat mode by renaming the folder to loot/hashcat_disable.
You quickly take the company logo from the main website and create a simple splash
screen with a "maintenance in progress" message:

From there you go back to the office you are infiltrating you take your laptop put it in a corner and boot p3ng0s.iso into dropbox mode.
From there on your red team has full access to the internal client network and you can use the previously found hashes / password to start infecting other machines and doing lateral movement:
nxc smb scope.txt -u Administrator -H os_killer:dumped_hash # hashes from os_killer.sh dump
/opt/pentest/impacket/bin/psexec.py localAdmin:CrackedPassword@sysadmin.notebook
From boot to domain admin, every step of that chain was covered across these four posts. That's p3ng0s.
Thank you so much for reading this series of blog posts about p3ng0s. Please repost the linked-in posts about this project to help me get this project out there. Also star it on github here. You can always reach out to me on linked-in see you soon for V2 of p3ng0s!
Categories
p3ng0s

Questions / Feedback
Donate
If you like the content of my website you can help me out by donating through my github sponsors page.